Showing posts with label tutorial. Show all posts

Sunday, July 21, 2013

Part III: Decorating a small room on a small budget

So far, y'all have seen my new color scheme and pillows, as well as my makeover of the class buckets, pencil holders and bathroom passes. 

Today, I'm going to share the quick update I did on my office chair, the cheap and easy border I made for my bulletin boards as well as some new bean bags I made! 

First, exhibit A - boring old office chair. Nothing wrong with it, of course, I just knew it could be more "fun." I can't resist an easy way to make my room more fun!


I thought about just hot-gluing the new fabric to the existing seat, but at the last minute I decided that I was classier than that. {LOL} So, I flipped that bad boy over, and started hunting for the screws that were supposedly {I read it on Pinterest} on the bottow of this thing, holding it all together. 


I found them, but there was one small problem -- all my screwdrivers looked like this. Pardon my French, but WTH? 


I found another one, but ... why do they make screwdrivers that look like that? #dumb

Annnnnyyywwwaayyy ... I unscrewed all the screws, and the plastic part just pulled off! 


So from there {and I don't have pictures of this part, it's pretty self explanatory}, I just put the fabric on the bottom, and hot glued it in a few strategic areas. I know a lot of tutorials say use a staple gun, but I don't have one ... and I'm not buying one! LOL. So I just glued it, and when I put the plastic right back over it, the plastic was enough to hold it in place. 

The top of the chair was a different story. I pulled and pulled, and looked and look but there wasn't a single screw that would pull off the back panel. It was going to be pretty sad to have a chair with a fun bottom and boring top! 

Then ... genius struck. {If I do say so myself.} I couldn't get the back panel off, but there was a small amount of space between the plastic and the fabric - enough that I could probably "stuff" the fabric inside it, if I could find a tool skinny enough. Enter ... the butter knife. 


LOL! I put the fabric on the top, making sure there was some overlap of the fabric over the plastic. Then I used the knife to wedge the fabric between the plastic and cushion. I trimmed off the edge of the fabric ....


And cleaned up the edges by pushing them into back behind the plastic. Bada-bing, bada-boom ... office chair!! 


And the before / after {with cute burlap polka dot} ... 


NOW! That was a "major" project (it only took about an hour, woo hoo!). Now for two smaller projects. First, bean bags. I had two bean bags that (to me) were a little flat and didn't match my new color scheme. Fortunately I also had some oilcloth that wasn't quuuiittteee big enough to fit over  the table in my room, so I used it for a new bean bag. It was SUPER simple. I folded it, sewed it into a square(ish) ... and put the filling from the old bean bag into the new one! I will say this ... those little pellets were A. GIANT. PAIN. They got everywhere. And looked like the dehydrated marshmallows that come with hot chocolate {But they weren't.} 


A view of the finished product .... BAM. Done. 


Next up ... border for my bulletin boards. I used a TON of border last year, and pretty much used up my store of "normal" bulletin board border {say that five times fast}. Cheap little ole me didn't really want to go purchase more, so what did I do? I made it out of crepe paper from the dollar store! And I'm SOOOO happy with the result. 

All I did was take two pieces of crepe paper, overlap them, and sew them together. The trick is ... {are you read for this?} .... {probably not} ... 

.... to up the tension setting on your sewing machine! Put that bad boy all the way up to its highest setting. {Mine's 9.} It ruffles it up! ... Voila! I used two packages of two rolls {so four total}, and I have one in reserve in case it's not enough or I think of something else to use it for. 


I told you it was easy. :) Now I'm off to Michael's to use the 20% coupon! {Thank you Instagram friends for the heads up!} 



Wednesday, July 17, 2013

Part II: Decorating a Small Room on a Small Budget

I'm still a decorating fool! Last time I introduced my new rug and color scheme - this time I'm here to share a little project I did with these mystery materials ... 


... and a cheap{ish} solution to a big {decorating} problem. If you've been following my Instagram, I bet you can guess the project!! 

*******

SO here we go! Project one: mystery materials. These two are pretty important areas in my classroom - pencil bins and girls' / boys' bathroom passes! I LOVED those vinyl chalkboard labels {$3, OKAY?!}, so I slapped a few on the mason jars and BOOM: 


Next up: bathroom passes. Always a pain, and I am NOT a fan of spending lots of money on something that inevitably gets lost. So I took a little bit of that ADORABLE burlap and polka dot ribbon and some rope, added a chalkboard label and again ... BOOM. Done. I will probably laminate the writing part so it doesn't wash off when it gets wet (I used a chalkboard pen --- soooo much easier than actual chalk). 


Now ... how about that BIG decorating problem? It's definitely the bajillion tubs I have floating around my room, with the four different color schemes I've tried throughout my teaching career. Last year I just went with a "colorful" theme because I had so much going on in my room (#AMIRIGHT?!!)

But this year, as you know, is my "make-my-room-feel-more-homey-I-spend-enough-time-there-that-I-want-it-to-be-a-space-I-like-and-that-kids-feel-comfortable-and-relaxed-in" year (say that five times fast). The primary colors were not doing it for me: 


Plus I had this {ultra-cute, oh my gosh ... but still primary ...} easel. 

The point is: I needed to change the color of those bins, and I didn't have a whoooolllle lotta dollars to spend buying new ones. Enter ... spray paint. I know. It doesn't stick to plastic. BUT! BUT!! After a lot of googling I found out that some smart person over at Krylon had engineered a spray paint that bonds with plastic! And it had great reviews! HALLELUJAH! 

So, I laid them all out on an old plastic tarp we had leftover from painting our living room, and got to work. I was REALLY pleased with the result. There are a few touch-up spots here and there, but overall the paint is sticking and I'm hopeful they'll last in my room. 


A few pro-tips {HAR HAR}. 
  1. Give yourself enough time, and do it outside. This was definitely a two-day project because of the number of bins, and the smell that comes from the spray paint. I plan on leaving mine outside to air out for at *least* four days. 
  2. Wear gloves and a mask. Painting the outside isn't hard, but when you get to the inside of the bins the spray paint billows up and gets all over you and in your face. I *should* have worn a mask, because I *know* breathing in that spray paint wasn't a good idea. Be ye not so dumb.
  3. Get close to the bins. Keep the paint moving so it doesn't drip, but if you stay too far away you'll waste a TON of paint. Get close enough that you can see it going on in a nice even coat. 
  4. I didn't see a huge difference in the gloss vs. satin finish, but I liked the way the satin coated better, FWIW. 
  5. It does take a LOT of paint. It took a good 2-3 passes on each bin for each to be covered fully. I painted probably 50 bins and the easel with 6-7 cans of paint (I stopped counting after the third trip to get more). Get more than you need and then return the rest. 
WHEW! I'm not done yet! I'll be back soon with more decorating updates, my summer/fall teacher wardrobe annddddd a Lucy Calkins update. :) See you soon! 


Saturday, July 13, 2013

Decorating a Small Classroom on a Small Budget

I've shared several of my small-room solutions and class decorations (here and here), as well as my new bee carpet (which I loved). One thing I didn't LOVVEEE about that carpet was the amount of dirt that was tracked onto it every day, and how the yellow of the carpet showed every little bit of dirt. I even rented a carpet cleaner after one quarter ... but it didn't do much for the look of the carpet. {Anndddd... I might have blown a fuse on that side of the room, rendering the outlets on that side useless for the rest of the year. Ahem.} 

This was when I first got the carpet ... {sniff, sniff}
After watching my precious bee carpet get dirtier and dirtier, I decided I needed to move it to a not-as-high-traffic area and replace our primary lesson carpet. Naturally, I turned to the bajillion Pinterest photographs of classrooms {and got SUPER overwhelmed ... #amIright?!} ... I decided I really wanted to tone down the "THIS IS A KID ROOM!!!" vibe and make my classroom feel more like my home {I'm there more than I'm at my own house ... #againamIright?!}. 

My inspirations were classrooms like Reagan's {click on picture to see more}  ...


... and these images ... 


Then, I found this rug on overstock.com {OY! I got it on sale, but I'm going to have to make it up elsewhere ...}. I loved how this rug had the yellow and blue from my bee rug, but pulled in the red from my desks. Plus, it didn't look so much like I bought it SOLELY for a classroom.


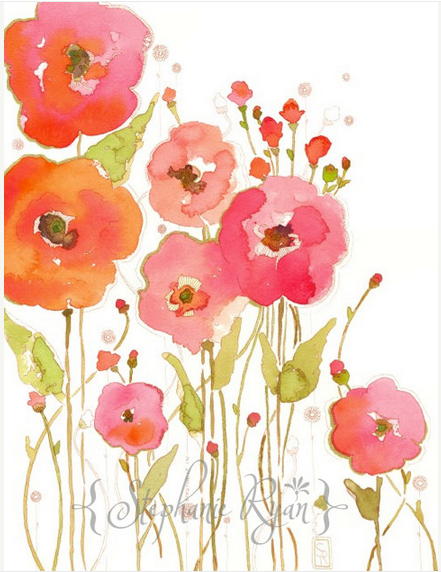
I also fell into deep, deep love with the work of Stephanie Ryan, a beautiful watercolor artist whose work I bought for my moms {my mom and mothers-in-law!} for Mother's Day. I decided  I could use the combination of the rug, the inspiration pictures and Stephanie Ryan's work as the "base" for my classroom decor. 


So I headed off to JoAnn Fabrics, which, can I just say --- totally overwhelming. Way too much stuff. I knew I wanted to pull the colors from the above pictures, but use a variety of patterns and textures so it had depth. {HAHAHAHAHA I'm channeling some HGTV here, can you tell?!}

I wandered around, pulling up these pictures on my phone, hoping I could find something that would work. Finally I settled on these three as a beginning {LOVE that gold polka dot burlap...}


One of the things I knew I needed to do was take care of some of the various pillows I have in the reading nook - they were cute, but didn't go with the whole color palette I have going on. So I headed up to my closest thrift store and bought some $2 pillows. I didn't care how they looked, I just needed cheap filling. 

I placed each of the pillows on top of the inside-out fabric and pinned it on three sides -- 


Then I pulled the pillow out, and popped it in the washer/dryer to get the cooties out, while I sewed three sides. {Oh! I should also mention that I used the gold polka dot burlap on the front-only for the pillows, mainly because it was $12.99 a yard. This budget only allowed for 1/2 a yard of that adorable-ness, so I bought some cheap-o $3/yd. brown cotton quilting fabric for the back. 


When the pillows were dry I flipped the sewed fabric right-side out (so now the seams are on the inside), put the pillow back in, and sewed up the one side I hadn't done before. Bam! Adorable pillows that I love! 


Here's what I have so far --- Cici approved, of course ... (there are some other fun things happening there too ... can't wait to share)! 


Check back later for two of the fun projects I made with these Hobby Lobby supplies ... !


See y'all soon ... 


Thursday, April 18, 2013

WD40 and Whiteboards - It really works!

I have this rolling whiteboard/easel that I use for carpet time - I love it, but it's seen better days. Recently I began getting really frustrated because it started leaving gross black residue every time I tried to erase, making mini-lessons SUPER difficult. Turns out I'd stripped all the special wiping properties away when I used my {very, very favorite cleaning tool} Clorox Wipes on them. OH NO.

But, have no fear. Googling saved my whiteboards, and it can save yours too! Google/Pinterest told me that WD40 would revitalize my white boards. Most of the sources I found were slightly iffy Yahoo! Answers-type things, so I figured I'd weigh in as an actual, honest-to-gosh teacher ... it works. A little smelly, so do it one afternoon so it can air out a little, but it works like a charm. Hallelujah!


Saturday, March 30, 2013

Adding a Watermark or "Brand" to Your Pictures and Thumbnails

You've probably seen the blog where most (or all) of the pictures have a little symbol in the picture that aligns with the blog. This is done to protect the blog/picture and to direct people back to the blog and/or business.

I've seen lots of tutorials on how to do it in Photoshop (I use GIMP ... it's free, holler!), but there is also a quick and easy way to do it in PowerPoint (it's a lot like the way you'd make a blog button - the tutorial I used for mine is here at the amazing Teacher Wife's blog!). PowerPoint isn't as powerful as Photoshop or GIMP, but for people who are used to working with it, using PP can be faster and easier to use.

First, make sure your PowerPoint slide is blank (no text boxes). {P.S. ... I'm working on a Mac with PowerPoint 2008 ... could definitely use an upgrade, but it still works, holler!} 


 Insert your picture {I'm working on a blog post about my energy projects}.


Then insert the picture file you want - I use the same image that I use as my blog button. 


Put the button where you want it and re-size to your liking. You can make it more or less transparent (to make it more or less obvious) by selecting the image and adjusting the transparency from the toolbar like this: 


Or by selecting the image, right-clicking and choosing "format picture" ... 

... then adjusting the transparency from that menu. 


Make the whole thing an image file by clicking FIRST on the picture, hitting SHIFT (to select more than one item), and then clicking the watermark image. If you don't click the picture first THEN the watermark, you'll have the picture on top of the watermark. {Weird, but true.}

 While still holding down SHIFT, right click and choose "Save as Picture."

You can choose many different file type - PNG formats still hold any transparency you might have added to the background. JPEGs work too though.


Now, if you want to add the watermark to your TpT preview thumbnails, follow the same steps, but choose images of your products. To do this, take a screen cap of your file's cover and/or any other pages you want to go in the thumbnails. On a Mac, to take a screengrab you just click SHIFT + COMMAND+4 and drag the image you want grabbed. {The product I chose was my "new math" tutorial.}


 Then, open your blank PP (or simply a new page on the existing presentation) -


 ... and follow the steps above to add a watermark, saving your file with a name you'll know is a thumbnail ... {perhaps TitleofProduct_Thumbnail}.

Once you've saved it, the best thing to do is lower the quality so the file size is small enough for a thumbnail. I do this in Preview. I open the file in Preview, then go to "save as." There, I'm given a choice of the file type -


I choose "JPEG," so I can change the quality.


Then I slide the bar until it's around 50 - 100 KB.


From the upload a new product screen, choose "Upload My Own Images."


Choose the files you created with your watermark, and BOOM! Images you can "pin" from TpT with your watermark on them. They'll not only lead back to your store, but also carry your "brand" across the Inter-webs. :)


Hope this helps!


Blogging tips